OpenESB Eclipse Studio
BPEL Auto-Suggestion Setup Guide in oXygen XML Editor (Eclipse Plugin)
Introduction
This guide walks you through the process of setting up auto-suggestions for BPEL files using a custom framework and extension in the oXygen XML Editor within Eclipse.
Installing the plugin BPEL via dropins
-
Make sure the Eclipse IDE has installed
- Eclipse Web Developer Tools
- Eclipse XML Editor and Tools
Guide - https://marketplace.eclipse.org/content/eclipse-web-developer-tools/help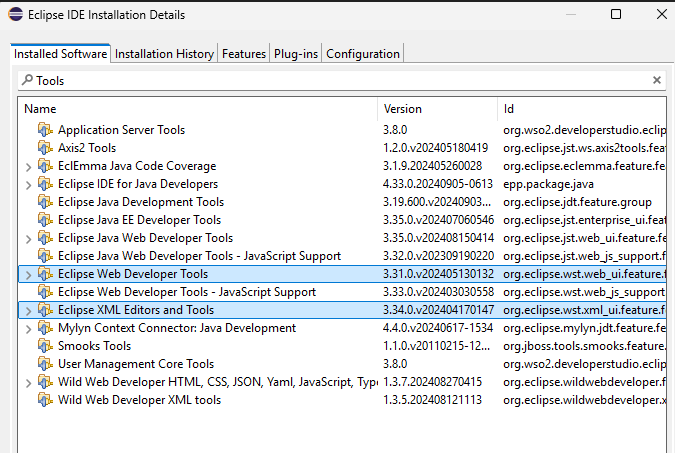
-
Locate your Eclipse installation directory. Example locations:
- Windows: C:\eclipse\
- Linux/macOS: /home//eclipse/ or /opt/eclipse/ -
Go to the 'dropins' folder. If not available, create a folder named 'dropins'.
-
Place the .jar file inside the dropins folder.
-
Restart Eclipse. Make sure to fully close and restart the IDE.
-
Verify Plugin Installation:
- Go to Help ® About Eclipse IDE ® Installation Details
- Your plugin should appear in the list.
Install oXygen Plugin in Eclipse
Make sure the oXygen XML Editor plugin is installed and working inside Eclipse.
https://www.oxygenxml.com/doc/versions/27.1/ug-editorEclipse/topics/install-eclipse.html
Configure Document Type Association
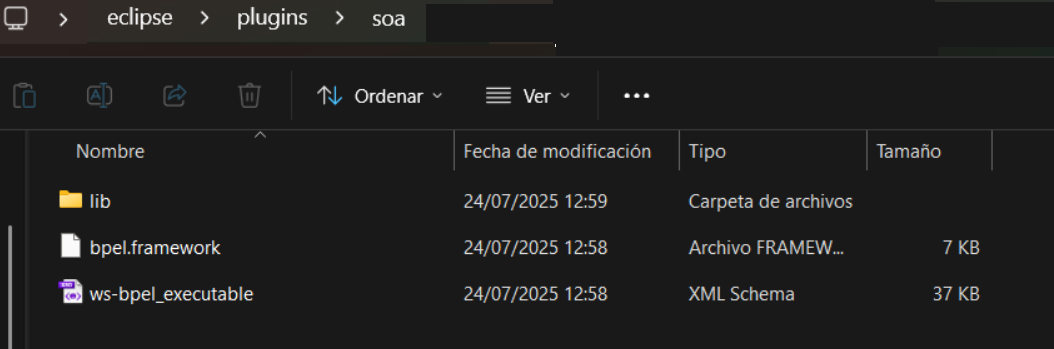
Prerequisite: Place the following files in the same local folder.
What we will do is create a folder called soa inside the Eclipse plugins directory.
The ZIP file contains the content that needs to be copied:
<![CDATA[https://nexus.vico.org:8443/repository/openesb-premium-jdk/Autosuggestion.zip]]>
The required files are:
-
bpel.framework -
ws-bpel_executable.xsd -
lib/Bpel-Location-SchemaManager-Filter-1.0-SNAPSHOT.jar
Copy these files into the newly created soa folder under the Eclipse plugins directory.
Step 1: Open Preferences
Navigate to: Window → Preferences → oXygen XML Editor → Document Type Association
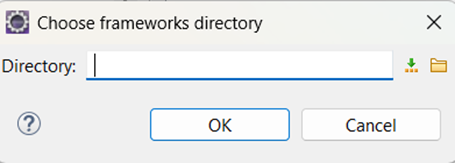
Step 2: Add Framework Directory
Click the "Locations" link and select New
Choose the folder where your `bpel.framework` file is stored.
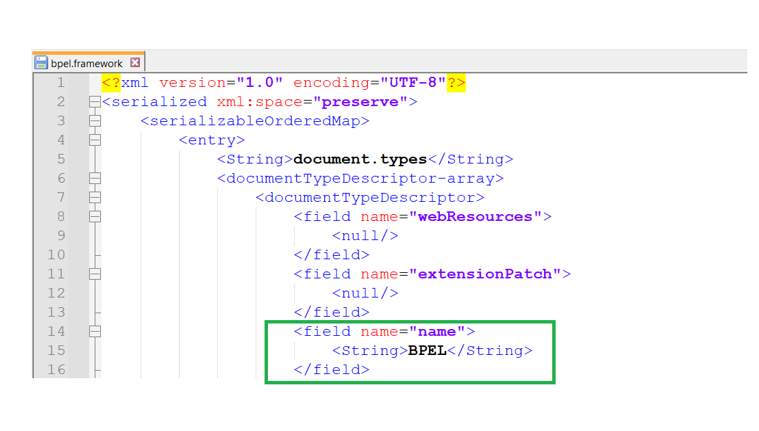
Step 3: Verify Framework Name Matches
The framework name must match what is defined inside the `bpel.framework` file.
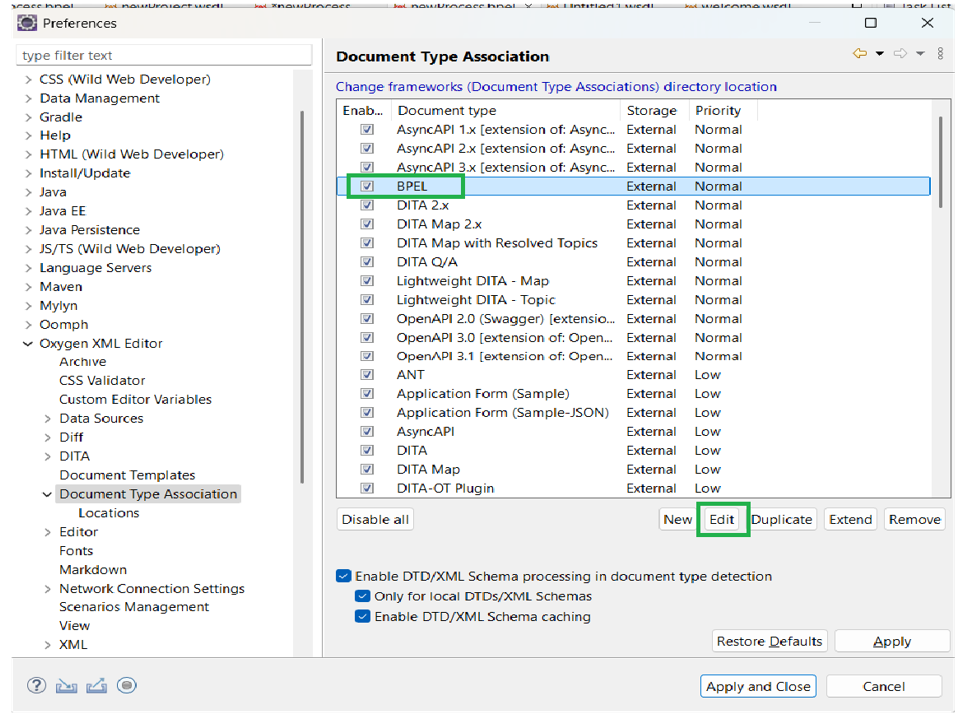
Step 4: Select and Edit Document Type
Select your BPEL document type and click Edit.
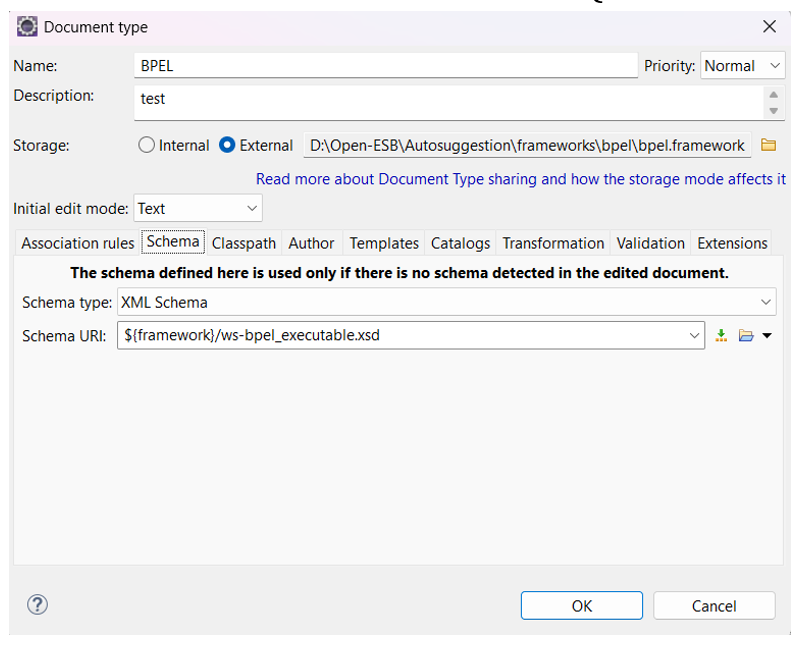
Step 5: Open Schema Tab
-
Verify Schema Type is set to 'XML Schema'.
-
Ensure Schema URI is set to ${framework}/ws-bpel_executable.xsd
Add JAR to Classpath
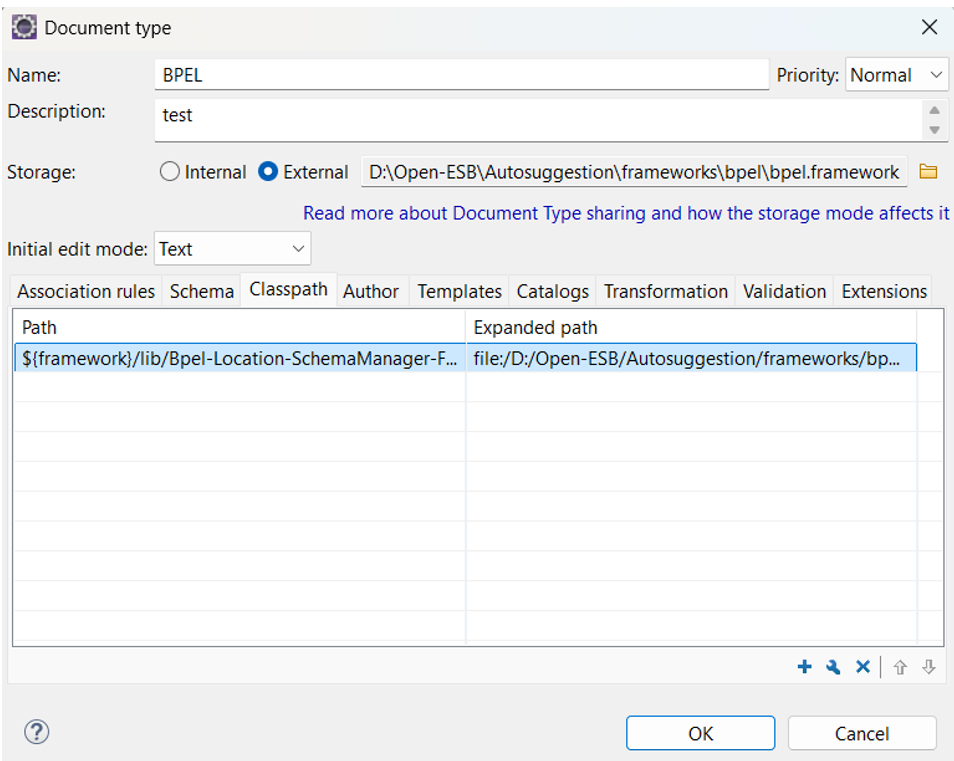
Step 6: Go to Classpath Tab
Ensure the classpath is set as shown in the screenshot below.
If not, follow the steps outlined below to configure it manually.
Click the + icon and add the directory that contains your plugin JAR file.
Configure Content Completion Handler
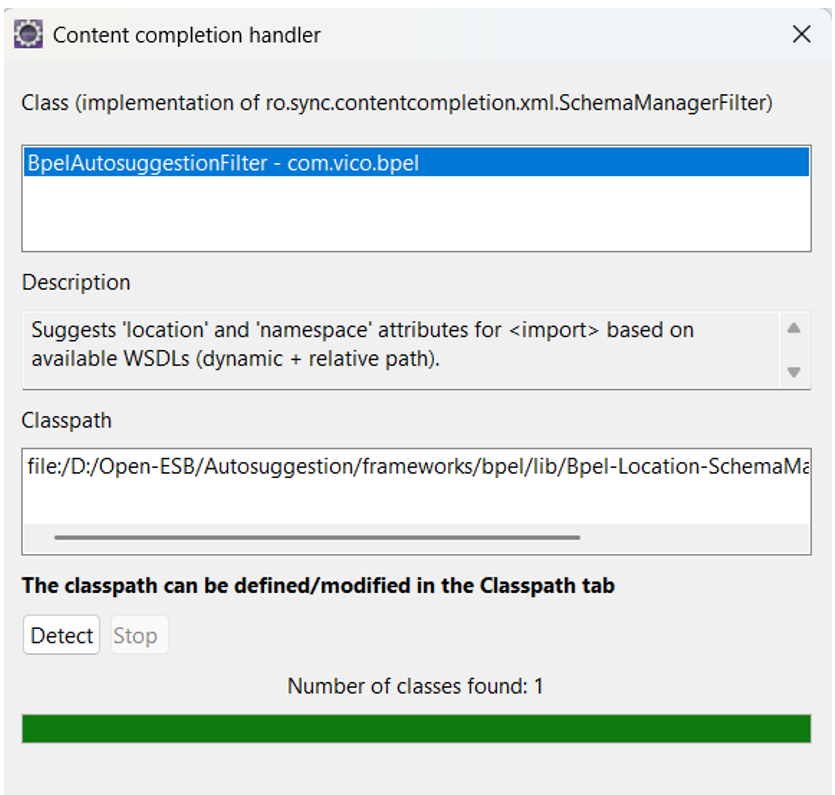
Step 7: Open Extensions Tab
Navigate to the Extensions tab.
Click Choose to Content Completion Handler.

Step 8: Select Main Class for Auto-Suggestions
Select the custom handler class i.e., BpelAutosuggestionFilter from the detected classes.
Verify Auto-Suggestion Works
Once setup is complete:
-
Restart Eclipse
-
Open a BPEL file.
-
Start typing
or . -
Press Ctrl + Space to trigger auto-suggestions.
Conclusion
You have now successfully set up the BPEL auto-suggestion feature in Eclipse using oXygen's framework and plugin system. This enhances development speed and accuracy when working with BPEL workflows.